
Fun With Photo Blocks #6
- Allison
- Apr 9, 2020
- 3 min read

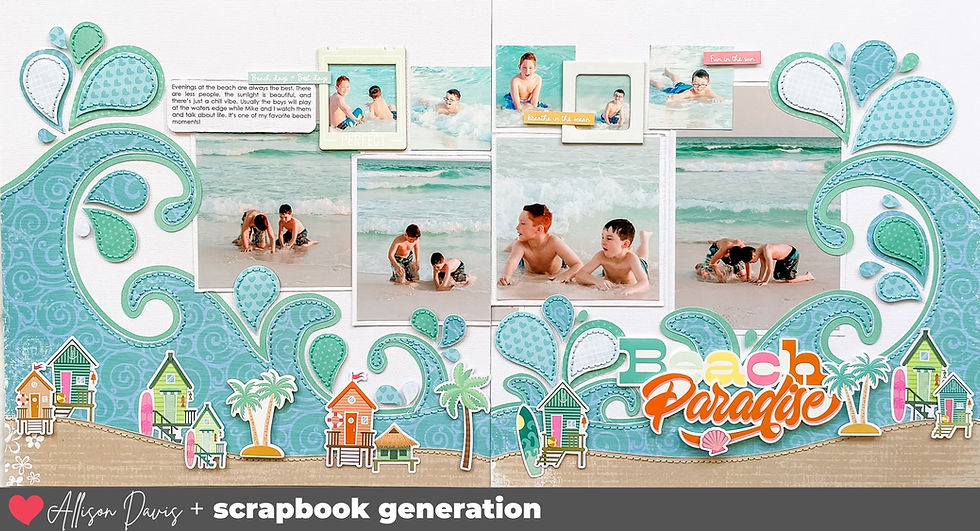
Get the best of both worlds by including more photos with a large photo block on one side of your layout while still having some fun by creating a more traditional scrapbooking design on the other.

What I enjoy so much with this concept of scrapbooking is how much fun you can have with the photo block side. I see each card and photo as a design opportunity. Add a sticker to an empty space in the photo, add a smaller photo to a card, add some stitching to highlight a design on a card, add some journaling... It's such a simple design, yet it packs a punch with so many fun elements for the viewer to explore.
My favorite piece on the photo block side is the 6 x 4" card with the camera squares and the 1" photos.

I had about a bajillion photos of this moment. (My editing software is telling me that bajillion is not a word, my vocabulary says it is.) Drew and Jackson were being silly with their Aunt Stacey and it was so cute! I snapped photo after photo in typical scrapbooker fashion until I had so many that I could probably fill not just a layout but a whole album of layouts.
I saw that 6 x 4" card and thought how fun would it be to mix in some 1" photos with those 1" squares.
Now I know that 1" is a tiny photo size and trust me, it's not one I use often. However, it's fun to mix it up here and there and use unusual sizes sometimes. The biggest bonus is that using such a small size gives you the opportunity to include a lot of photos on one layout. I was able to add six more to mine!

Since they are so small, the chance of being able to crop them from a 4x6" print are pretty slim. I used Photoshop to crop and edit them and then printed.
Another bonus to using 1" photos is that you can include those not-so-perfect photos without it being so noticeable. For example, as I was taking the photos on my layout Drew and Jackson were running around like crazy people and so I had several photos that have some blur in them. I wouldn't have selected them for my main, focal photos, but they worked perfectly as the smaller size. You still get the action of the photos without the not so great picture quailty being so obvious.

A few ideas on different ways to use 1" photos:
• Frame a large photo with the 1" photos, this will work with any size of photo depending on how many photos you have. You can also mix in some 1" squares of patterned paper.
• Use them to fill in a square pattern (like I did on my layout.)
• Mix them in with embellishment clusters.
• Create a large grid of many, many 1" photos (think of layouts like a year in review, a day in the life, our vacation at a glance, etc.)
• Substitute them for a photo on a sketch. You can create a grouping of 1" photos in the same size as the photo on the sketch.
If you have knowledge with using Photoshop or any other photo editing software and know how to crop your photos before you print, I challenge you to try using tiny photos!
Want to see more? Find me on...


But link the Mirage 34 doesn't compromise on performance. The efficiencies realized by the asymmetrical shape mean it maintains link a link large barrel and 72-hour power reserve. The caliber 215 beats at 3.5 Hz, slightly faster than the caliber 233's 3 Hz.
Savraj is from Kenya, where he runs an autobody shop with his father. His father bought this Omega Speedmaster ref. link 145.012 in 1968, and wore it while working ever since – and link it shows. The dial and hands were replaced during a repair, but Savraj searched and found the original dial. As a budding collector, Savraj says link that you are meant to wear and enjoy watches, just as his father did.