


Sketch Support #46 | Learn How to Use and Adapt Scrapbook Sketches | Day 1

Once a month learn how to use scrapbook sketches and adapt them to fit different styles, photo sizes, and themes. Sketches = endless scrapbooking ideas with little effort. Sketches do all the heavy lifting allowing you to have all the fun!
This sketch is one that has been years in the making. Not for any kind of exciting or glorious reason. Just that I started with the large star in one month. Ditched my original idea. Went back months later and added the stars cluster. Deleted things, added things, deleted more things. Maybe a few more months later added the background piece. Removed the background piece and added strips instead. Went back to the background piece. This went on for well over two years! But, I finally decided it was time to finish and put it to good use, so here we are!
Here is the two-page sketch that I'll be using this week:
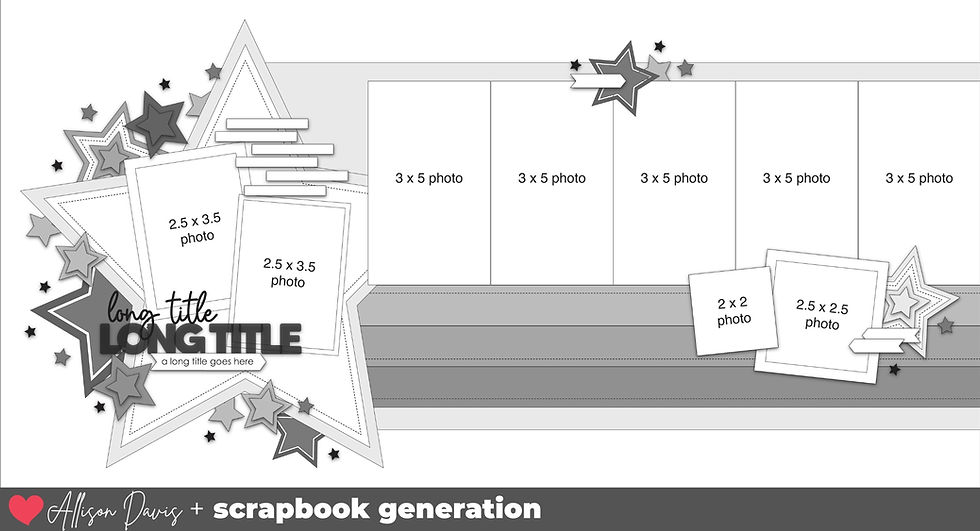
You can also grab the Sketch Support #46 Bonus Sketch Examples!

This month it is a 3-page PDF of 22 different sketch options. That makes 23 sketches for this month of Sketch Support. There are options that show how to change up the papers, use more photos, use less photos, there are three one-page options, and then an 8-1/2 x 11" option. The fun part is that you could use each option as a layout on its own, but you could also mix and match different options for endless possibilities!
I've also designed a cut file that matches the large star with the star cluster on the edges. If you have a die cutting machine, this can make putting this layout together much easier!

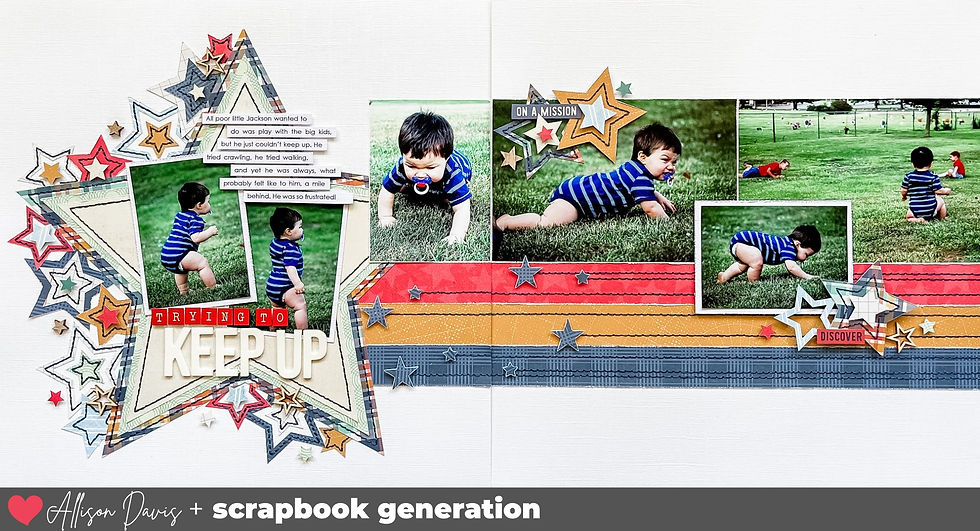
Supplies used - Cardstock: Bazzill; Patterned paper: My Mind's Eye, Simple Stories, and PhotoPlay; Foam alphabet: American Crafts; Alphabet stickers: unknown; Wooden stars: unknown; Star punches: Fiskars and Recollections; Embroidery floss: DMC; Computer font: Century Gothic
Variation #1 - Changing the photo sizes.
This set of photos have lived a very life sitting on my table so I felt like it was time to finally get them on a layout! I was working with three 6 x 4" photos, two 2-1/2 x 3-1/2" photos, and one 3-1/2 x 2-1/2" photo. The two 2-1/2 x 3-1/2" photos were perfect for the left page on the star so I didn't have to make any changes there.

With the 6 x 4" photos one of them needed to be cropped down to work on the left page and thankfully of the three, one of them could be cropped down. I went with a 3 x 4" photo so that it would still match the height of the remaining 6 x 4" photos while not covering up too much of the large star background. The other two 6 x 4" photos fit perfectly on the right page. This made the row of photos an 1" shorter than the original on the sketch. That's a win to me! It's still covers the same general area and I can shift the rest of the element to work with that 1" difference.
For the last photo, I used the 3-1/2 x 2-1/2" photo in place of the two smaller photos on the right page.

Variation #2 - Removing the background.
On the sketch there is a large background that sits behind the photos and the horizontal strips. I opted not to include that mostly due to the colors and patterned papers I decided to work with.

The colors in the photos are quite bold and I like the idea of the sharp white space as a contrast to them. As far as the patterned papers I used, I just couldn't find one in the bunch that I liked in that space. Removing a background or detail that just doesn't work for you is always an excellent way to make the design work for you!
Variation #3 - Add different elements.
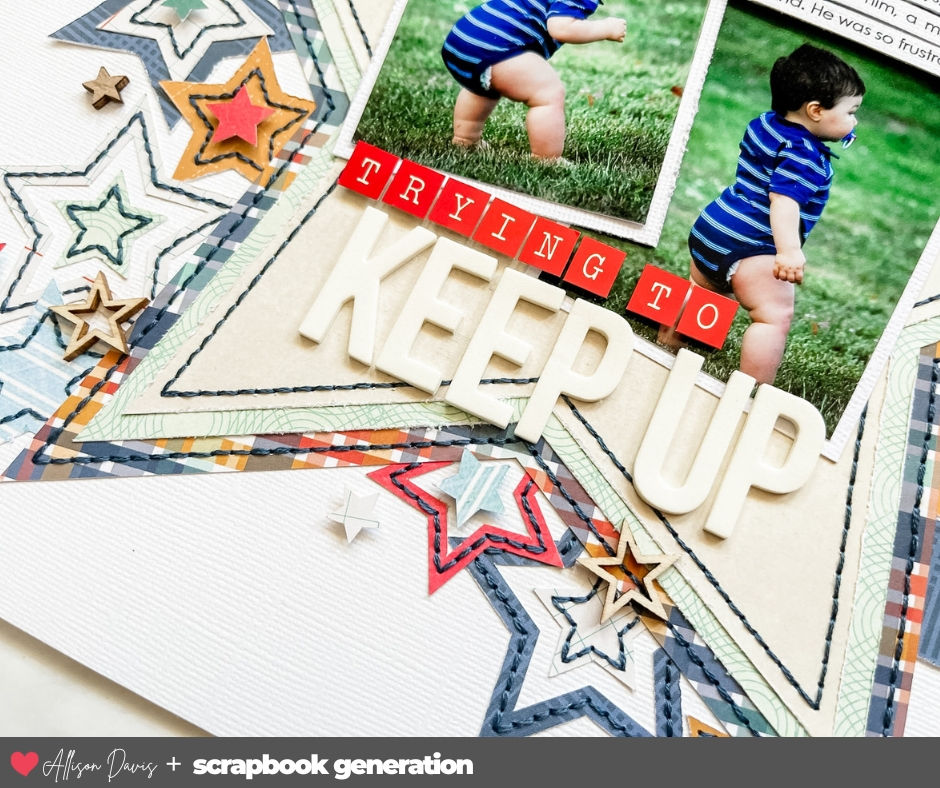
I knew I wanted to add stitching on the horizontal strips along the bottom edge of the photos, but decided to do something a little custom to the theme and story of the layout. I stitched lines at varying lengths and added small stars at the ends. I thought this was a good way to represent movement and enhance the theme a little.

For the star design on the left page, I followed the sketch closely. I layered together three larger stars for the base and then added lots of smaller stars in a variety of sizes around the left edges. And of course I had to add lots of stitched borders to them!!

That's all for today! Be sure to check back tomorrow for layout #2!
Shop all sketches here: Allison Davis Sketches
Shop all cut files here: SG Cut Files
Want to see more? Find me on...


Comments