
Scrapbook Design Idea | Sectioned Background
- Allison
- Mar 3
- 3 min read

A lot of times when I kind of stumble on a new (to me) concept, I tend to use it often. I am a strong believer in using concepts over and over. We don't always have to reinvent the wheel. I tend to focus on the concept and think of ways I can adapt it to different shapes or themes or ideas.
The layout I'm sharing today features a concept that I've been kind of obsessed with lately.

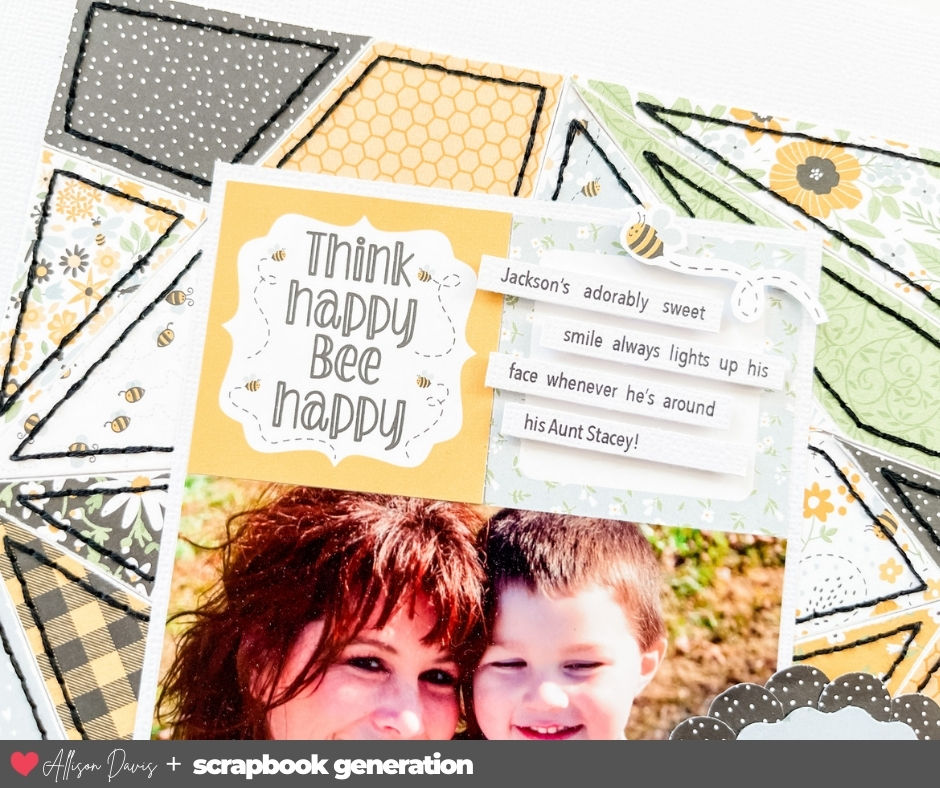
Supplies used - Cardstock: American Crafts; Patterned paper and die cuts: Echo Park "Bee Happy"; Embroidery floss: DMC; Computer fond: Avenir Next Condensed
I tend to find myself pulled to designs that feature smaller pieces grouped together to form a larger background. I think it's my obsession with 6x6" paper pads that got me hooked on that idea!
To create this particular design, I started off with a square cut out of cardstock. This is to serve as the base for this design. I cut a 10 x 10" square for this layout, but you can adapt the square to whatever size you want.

Then I used a ruler and pencil to draw lines creating those different sections. For this part I usually start with one or two slanted lines that go from edge to edge and then I fill in the rest with some smaller connecting lines. The biggest thing to watch out for is to not create too small of sections. They can be a lot harder to work with and if you want to add the stitching detail, you aren't left with much space to stitch on.

After I am happy with the sectioned design first I like to take a photo of it, then I number each piece. The photo and the numbers are great as a reference just in case they get out of order. The number also helps with knowing where to adhere your paper.
To cut them out I use my paper trimmer and as I cut out each piece I lay it down on my table in the correct order. You can also use scissors if you find that is easier.

With each piece cut out, next you would start adding your patterned paper on top of each section. The number is a good reminder of which side the patterned paper will be adhered to. I put my adhesive on that numbered side and then adhere it to the backside of the patterned paper I want to use. Then you just use scissors to trim off any paper hanging over the edges. As I cover each piece I lay it back in the correct spot so I don't mess up the arrangement and order of them.

After each piece is covered (I also sanded the edges of them), then I adhere them onto my 12x12" cardstock base, one by one. This is when a 6 x 12" Omnigrid ruler really, REALLY comes in handy!
To me, this is such a fun concept that can be used over and over! You can even change the shape of the overall design. Or, if you want an easier approach and you have a die cutting machine, we have several sectioned design cut files.


Shop all sketches here: Allison Davis Sketches
Shop all cut files here: SG Cut Files
Want to see more? Find me on...


Comments