
Sketch Support #29 | Learn How to Use and Adapt Scrapbook Sketches | Day 2
- Allison
- Feb 21, 2023
- 2 min read

Once a month learn how to use scrapbook sketches and adapt them to fit different styles, photo sizes, and themes. Sketches = endless scrapbooking ideas with little effort. Sketches do all the heavy lifting allowing you to have all the fun!
My day two layout shows how to stretch this design for larger photos.
Here is the sketch that I have used as the starting point for each layout this week:

You can also grab the Sketch Support #29 Bonus Sketch Examples!

This month it is a 3-page PDF of 22 different sketch options. That makes 23 sketches for this month of Sketch Support. There are options that show how to change up the papers, use more photos, use less photos, there are three one-page options, and then an 8-1/2 x 11" option. The fun part is that you could use each option as a layout on its own, but you could also mix and match different options for endless possibilities!

Supplies used - Patterned paper: Cocoa Vanilla; Glitter paper: WRMK; Foam "hello": Jillibean Soup; Alphabet stickers: Pretty Little Studio and Elle's Studio; Frame: My Mind's Eye; Computer font: Century Gothic; Embroidery floss: DMC
Variation #1 - Using larger photos.
I started off with the same amount of photos as the sketch, but they are all 6 x 4" and there's no room for cropping them down. An easy way to adapt the sketch to work with the larger photos was to stretch the design to the left and right edges.

The photos are still arranged in the same manner as the sketch, but they go all the way across the layout.
Variation #2 - Using horizontal strips instead of the layered background pieces.
I could have still followed the sketch for the background pieces and it would have worked just fine, but I really liked the idea of stretching the papers to the edges as well. I used three different patterned papers, just like the sketch.

I also loved the idea of the stars going all the way across! I mostly used stars cut from a patterned paper and then I added some hand-stitching on them to add some texture and dimension.

Then I filled in the rest of the design with some punched stars and glitter stars.
I also used the same stars around the journaling block.

It ended up being a lot more detailed than the stars on the sketch!
That's all for today! Tomorrow I'll be sharing another layout based on this sketch!
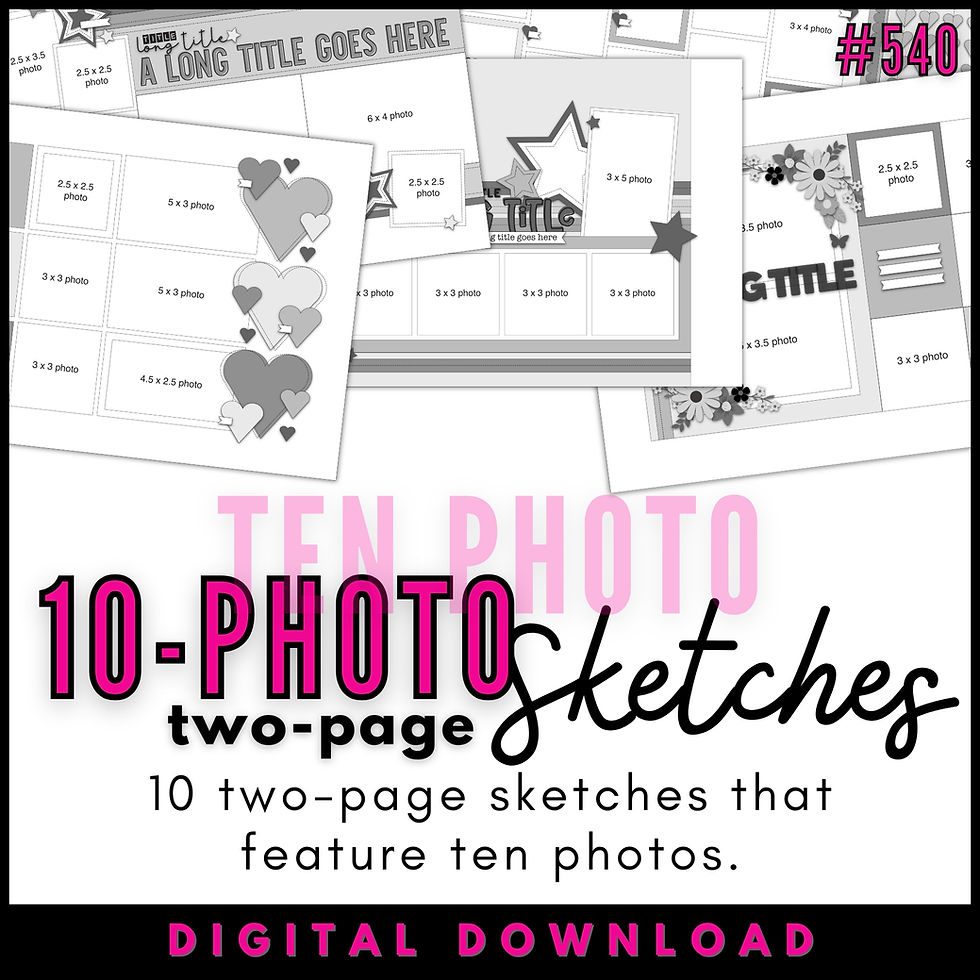
And, if you enjoy this sketch, I just added a new two-page sketch bundle at Scrapbook Generation.

This set has 10 two-page sketches that all feature ten photos.
You can purchase them here...
These sketches are great for those times when you have a lot of photos that you want to include on one layout. There's a wide range of photo sizes too! And, even though these sketches are photo heavy, there's still a lot of paper use and fun designs included!
We have tons of different sketches available at Scrapbook Generation! You can find them all here...
Want to see more? Find me on...


The choice to go with that rose opaline coloration changes what was once a serious statement in horological precision and movement-making, and relaxes it a bit. In many ways, this dial, and the overall appearance of the contrasting colors, reminds me of one of those deep pink and orange sunsets link – you link know the one everyone feels compelled to take a picture of link on their phone and share on social media.
Just like any of the above buildings, I wouldn't say link I ever really felt like link any HM was link really for me (save for maybe the HM5 or HM8 Mark II). But I still do my best to at least interpret them and understand the appeal.