
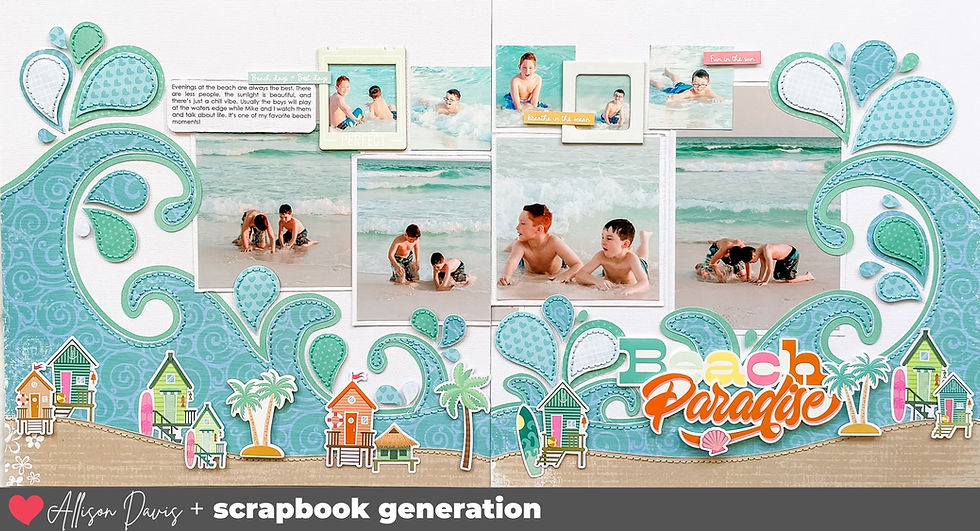
Scrapbooking Design Idea: Using Shapes Clustered to Frame a Large Shape
- Allison
- Mar 31, 2021
- 2 min read


Supplies used - Cardstock: American Crafts; Patterned paper, die cuts, stickers, and chipboard pieces: Simple Stories; Heart cut files: Silhouette; Embroidery floss; DMC; Computer font: American Typewriter
There are two ways you can create this shapes clustered to frame a larger shape design. I feel like both are incredibly easy to make so either option works.
I'll start with the way I created mine...
Option #1
1. First I used my Silhouette to cut a large heart out of the center of a piece of cardstock.
2. I adhered it on top of a 12 x 12" piece of wooden patterned paper.
3. Then I tucked several different sizes of patterned paper hearts under the edge of the large cardstock heart frame. I used mostly larger hearts for this part.

4. Next I added some smaller hearts to help fill in any gaps between the larger hearts. I used foam adhesive to adhere some of them to add a little dimension.

5. I finished the heart design by adding a stitched border around the edge of the heart.
Tip: Try adhering the cardstock frame to the wooden patterned paper will foam adhesive. It will really make the frame stand out.
Option #2
1. Cut a large heart out of the wooden patterned paper.
2. Adhere the hearts around the edges of the wooden patterned paper heart. I would follow the same format as option #1 by using the larger hearts first and then filling in the gaps with the smaller hearts.

3. Turn the large heart over and trim off any of the heart pieces that are hanging over the edge.
4. Adhere the large heart to the middle of your cardstock base.
5. Finish with a stitched border around the heart.
This design would work with tons of different shapes and themes for easy customization to anything you want to use!
Want to see more? Find me on...


A good Day-Date 1803 is still available link for less than a great 5513, a 1016, or a 1680 'White,' Wind says. "There are any number of link watches it is less expensive than right now, but inherently, the gold value will be much higher – you have inherent link downside protection."
Caliber: link 31-260 REG QAFunctions: Hours, minutes, seconds (using a regulator-style display), annual calendar with disc displays for the month, day, and dateDiameter: 33mmThickness: 5.08mmPower Reserve: 48 hoursWinding: Automatic with a 22k gold micro-rotorFrequency: 23,040 vphJewels: 31Total Components: 313Patek Phillipe SealAdditional Details: Uses link a link Pulsomax escapement, a Spiromax balance spring, and a Gyromax balance