
Scrapbooking How to: Creating a Background With a Stencil
- Allison
- Nov 5, 2019
- 2 min read

Stencils can have many different uses when you pair them with scrapbooking tools and products.

Most of the time when I think of using stencils my thoughts go towards products like mists, inks, watercolors, Nuvo Embellishment Mouse and Glimmer Pastes. Which makes sense because I think most stencils are geared towards those products.
Most, but maybe not all.
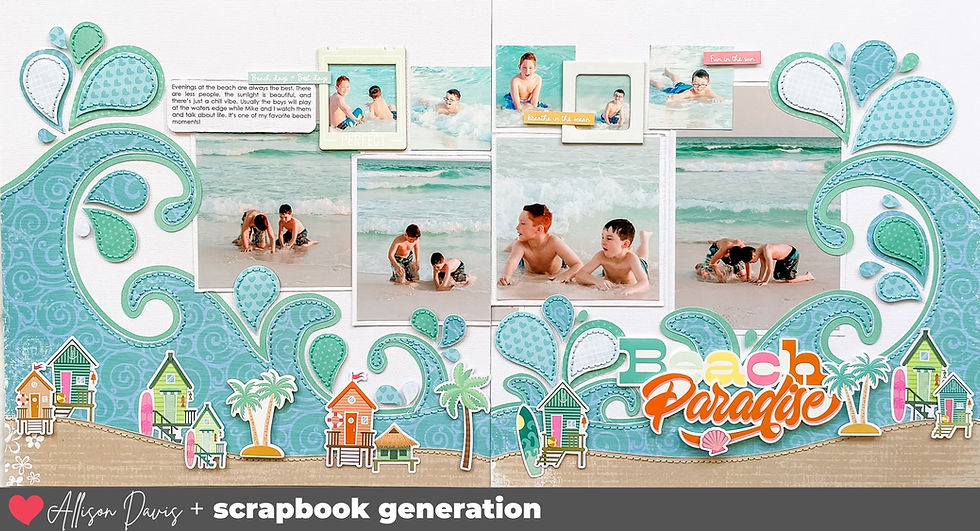
I came across a Crafter's Workshop 12 x 12" stencil that I thought would partner well with something different than the usual stencil product pairings. Because this particular stencil had a large, simple design I could use it with patterned papers and of course, my favorite, hand-stitching.
Here's how I put this design together on my scrapbook layout.
Step #1 - Trace the design that you want stitched.

I started by placing the stencil where I wanted my design to go and tracing only the designs I wanted to hand stitch.

Step #2 - Trace the design that you want out of patterned paper.
Next I used the stencil to trace the designs and then cut out the individual patterned paper pieces.

Step #3 - Add the patterned paper pieces to your background that has the traced designs for stitching.
It helps to have the stencil nearby to use a reference for correct placement.
Step #4 - Add your hand stitching.
First use a paper pierce to pierce the holes around the pencil lines. After you have all the holes pierced, erase the pencil lines and begin your stitching.
I also added hand-stitching to some of the patterned paper pieces. To do this use a ruler and place it about 1/8" from the edges to draw a pencil line. Pierce your holes on the pencil lines, erase the pencil lines, and begin stitching.

Now you have an eye-catching and unique background that was easy to create!


Comments