
Sketch Support #23 | Learn How to Use and Adapt Scrapbook Sketches | Day 4
- Allison
- Feb 24, 2022
- 3 min read

Once a month learn how to use scrapbook sketches and adapt them to fit different styles, photo sizes, and themes. Sketches = endless scrapbooking ideas with little effort. Sketches do all the heavy lifting allowing you to have all the fun!
The last layout of Sketch Support is always about showing how the size of the sketch doesn't have to determine the size of the layout you create. There are many ways you can adapt a two-page to work for a one-page layout and vise versa. For my layout today I used pieces of the two-page sketch to create a one-page layout.
Here's the sketch that I have used as the starting point for each layout this week:

You can also grab the Sketch Support #23 Bonus Sketch Examples!

This month it is a 3-page PDF of 22 different sketch options. That makes 23 sketches for this month of Sketch Support. There are options that show how to change up the papers, use more photos, use less photos, use only 4 x 6" photos, there are three one-page options, and then an 8-1/2 x 11" option. The fun part is that you could use each option as a layout on its own, but you could also mix and match different options for endless possibilities!

Supplies used - Cardstock: American Crafts; Patterned paper: Simple Stories; Large star cut file: Alaa' K from the Silhouette Design Store #14976; Star frame cut file: Paige Evans from the Silhouette Design Store #375233; Wooden stars: Simple Stories; Wooden "adventure": Heidi Swapp; Glitter paper: DCWV Glitzy Mat Stack; Alphabet stickers: Simple Stories; Star punches: Fiskars and Recollections; Watercolor: Pinkfresh Studio; Embroidery floss: DMC; Computer font: Century Gothic
Variation #1 - Creating a one-page layout from a two-page sketch.
There are typically four ways you can convert a two-page sketch to work on a one-page layout.
Use the left page.
Use the right page.
Use the whole page design, condensed down to fit.
Use a combination of a few elements from both pages.
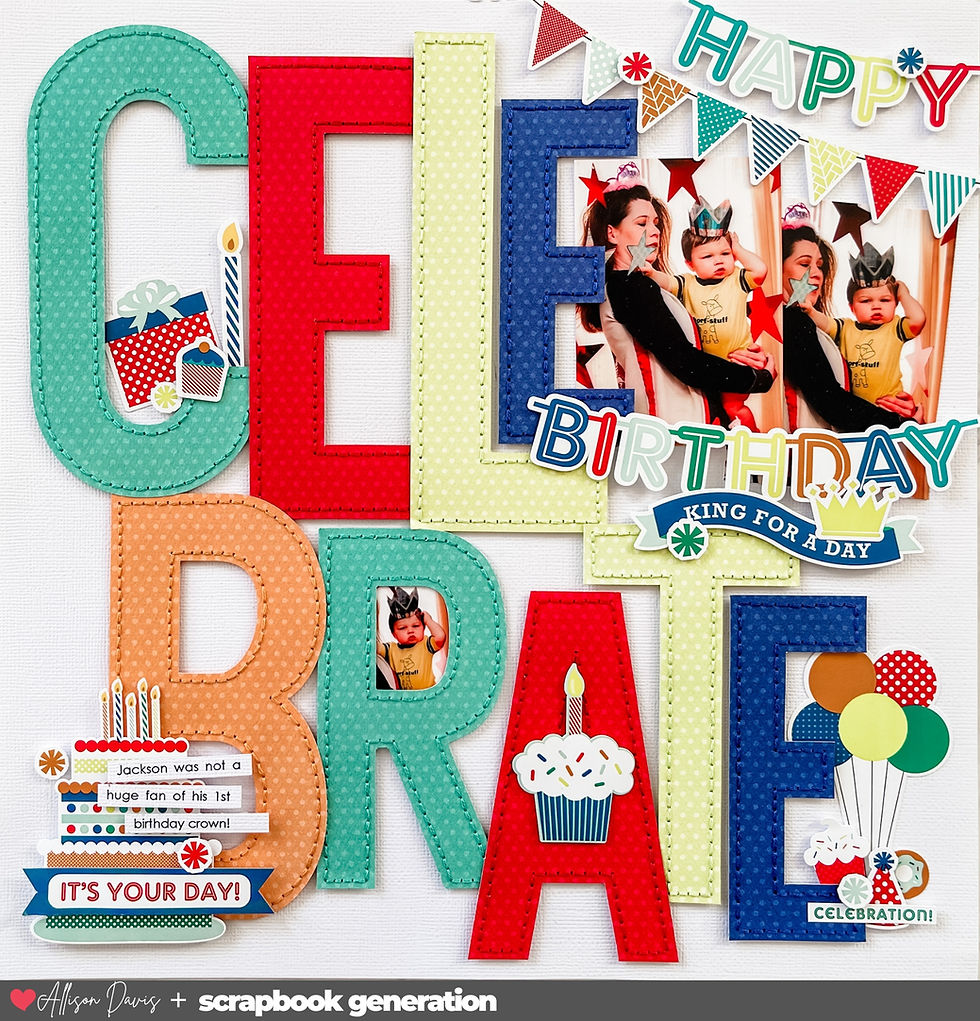
I used #4 for my layout, combining a few elements from both pages. The elements I combined are the photo arrangement from both pages, the title and journaling details and placement, and the large heart element from the left page.
Variation #2 - Use a large star in place of the large heart.
I knew one of the shapes I wanted to possibly use in place of that heart was a star. Being the mom of boys, stars are a shape that I turn to often. Plus, I just really like working with stars, I always have.
I used two different star designs layered together. The first one is cut from the triangle patterned paper and it's quite a bit larger than the heart on the sketch. I cut it on my Silhouette so that is it tilted and stretches off three edges of the layout.
The second star design is a layered star frame that I also cut from my Silhouette. For this one I used black cardstock and cut it slightly smaller than the larger patterned paper heart. I thought that black would be a good compliment to the colors of the patterned paper and would really stand out.
To finish the look I added a hand-stitched border around the largest star.
Variation #3 - Using different photos sizes and flipping the photo arrangement.
Since I was creating a one-page layout, I condensed the photos down to one 3 x 5" photo in place of the 4 x 6" photo and two 2-1/2 x 2-1/2" photos in place of the 3 x 4" photos. While there are less photos, they are arranged very similarly to the sketch with one exception: I flipped the photos. With the direction Drew is facing in the photos I felt it looked better with the larger photo on the right and the smaller photos to the left.

Variation #4 - Adding extra details to the design.
I added some watercolor splatters to the base patterned paper and a spread of small stars across the layout.
I thought the watercolor was a fun addition to the boyish theme and colors. I used mostly black and then added in a few small dots of a dark blue to coordinate with the blue bars in the photos.

Almost all of the stars were leftover from a layout I made long ago with this collection. They were an easy and fun addition to the playful theme of the layout. I used foam adhesive for some to add a little dimension.

That's all for day 4! Come back tomorrow for the video version of Sketch Support! I'll talk through all of the details of the layouts and sketch and also share a few short tutorials on some designs created this week.
Want to see more? Find me on...

The movement is visible through a wide and bright caseback and, thanks link to the lack of a winding rotor, we get a pretty good view of the movement architecture link and link the finishing, which shows rhodium plating and arabesque Geneva waves.
Integrated bracelets currently being, as the younger generation likes to say, "a thing," it's easy to guess why Omega has breathed new life into the Constellation at this time. The company certainly knows link a thing or link two about selling watches, and these new Constellations, link while not the stuff of watch geek fodder that the stainless steel Speedy 321 sure is, seem likely to be a really big commercial success.
The black outline stars do just what you said and it adds so much texture to your project. I 💘 this layout and this fun usable sketch. Thank you Allison!