Sketch Support #30 | Learn How to Use and Adapt Scrapbook Sketches | Day 1
- Allison
- Mar 27, 2023
- 3 min read
Once a month learn how to use scrapbook sketches and adapt them to fit different styles, photo sizes, and themes. Sketches = endless scrapbooking ideas with little effort. Sketches do all the heavy lifting allowing you to have all the fun!
It's that time! Sketch Support is here!
This month there is a new, FREE one-page sketch that I'm sharing with you all plus I've created four layouts all based on that same sketch. The point of Sketch Support is to show how you can easily adapt and customize a sketch to fit any needs whether it's theme, photos, or supplies. I'll be sharing a different layout Monday through Thursday and then next Monday I'll share the video version on YouTube.
This sketch has a fun, detailed background that you can customize to so many different shapes or strips or adjust to different sizes.
Here is the sketch that I have used as the starting point for each layout this week:

You can also grab the Sketch Support #30 Bonus Sketch Examples!

This month it is a 3-page PDF of 23 different sketch options. That makes 24 sketches for this month of Sketch Support. There are options that show how to change up the papers, use more photos, use less photos, there are four two-page options, and then an 8-1/2 x 11" option. The fun part is that you could use each option as a layout on its own, but you could also mix and match different options for endless possibilities!

Supplies used - Cardstock: American Crafts; Patterned paper: Echo Park, Simple Stories, My Mind's Eye, PhotoPlay, and Bella Blvd.; Die cuts: Bella Blvd.; Stickers: Simple Stories; Alphabet Stickers: Elle's Studio; Embroidery floss: DMC; Computer font: Avenir Next Condensed
I made several changes to the sketch to better fit my theme while also still following the general design of the sketch.
Variation #1 - Turning the background into a themed element.
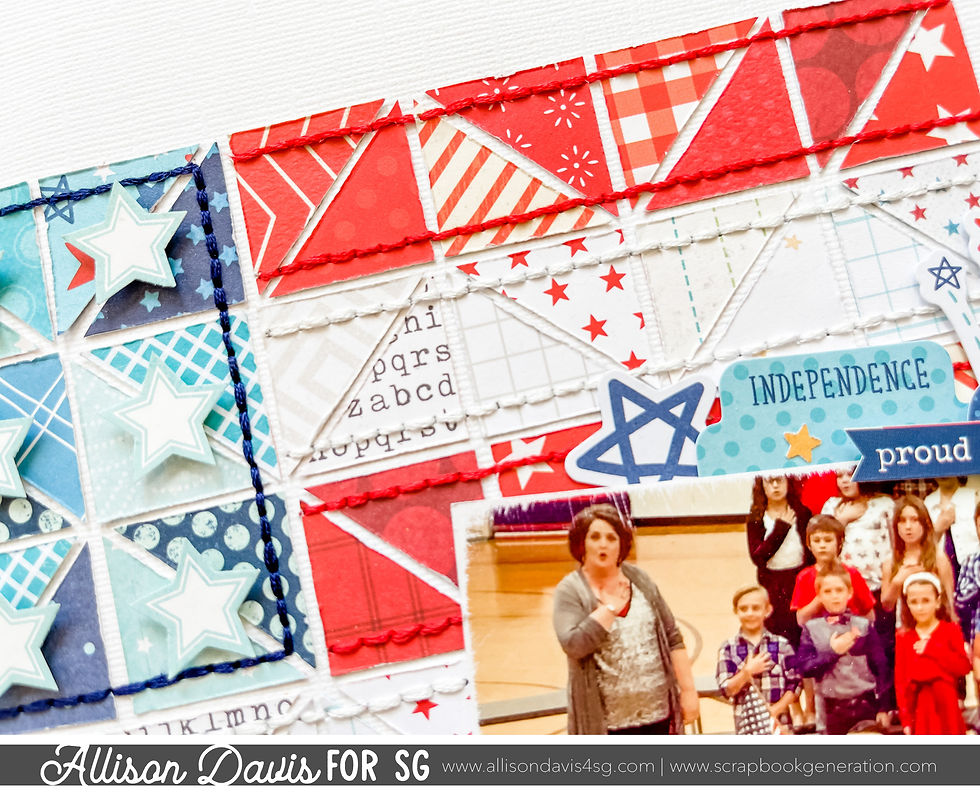
When I selected this picture I knew that I wanted to create some sort of flag background with the triangle pieces. I love playing around with a theme and taking it to an extreme level! To do that I used a variety of blue patterned paper to make a square with stars and then white and red patterned papers to create the stripes.
Variation #2 - Reducing the size of the triangle pieces to add more.
To have the flag design I had in mind I decided to reduce the size of the triangle pieces so that I could add more. This gave me a larger blue square for the stars and some extra rows for the strips. It looked much more like a flag this way.
You could easily change up the sizes of the triangle pieces or add more to adapt to any design idea you might have.

I also changed up the stitching on the triangles to work with this theme. I added a blue stitched square around the blue triangles pieces. Then on the red and white triangles I added horizontal lines with red and white stitching. This, to me, really brought the image of a flag background together.
Variation #3 - Using one larger photo in place of the two smaller photos.
I had just one 4 x 4" photo for this layout so I used that in place of the two 2-1/2 x 3-1/2" photos. The combined measurements for the two photos is 5 x 3-1/2 which isn't really that far off from a 4 x 4" photo so I didn't have to make any major adjustments to make it work.


If you enjoy using sketches and want to learn how to adapt and customize them, I have a new guide called Creating With Sketches. It's goes in depth of how I breakdown a sketch design and adapt to work with my needs. It covers everything you need to know about making sketches work for you.
Shop all sketches here: Allison Davis Sketches
Want to see more? Find me on...


The shape and details of the Cartier link Santos have been respected by the new model, but it does seem to be a bit more smooth on the edges and curves. We will get back to you with a link hands-on article link very soon to share our experience with the new Cartier Santos.
Inside the case is a Master Chronometer certified movement, the Caliber 8900 for the 41mm (60 hours of power reserve) and Caliber 8800 (55 hours of power reserve) for the 38mm and 34mm versions. link If you head link over to the Omega website, you can see that each watch is already available for purchase for $6,100 (regardless of size), so if the only thing holding you back from an Aqua Terra was the lack of traditional dial link options, you can pick one up today.