
Sketch Support #37 | Learn How to Use and Adapt Scrapbook Sketches | Day 2
- Allison
- Mar 26, 2024
- 2 min read

Once a month learn how to use scrapbook sketches and adapt them to fit different styles, photo sizes, and themes. Sketches = endless scrapbooking ideas with little effort. Sketches do all the heavy lifting allowing you to have all the fun!
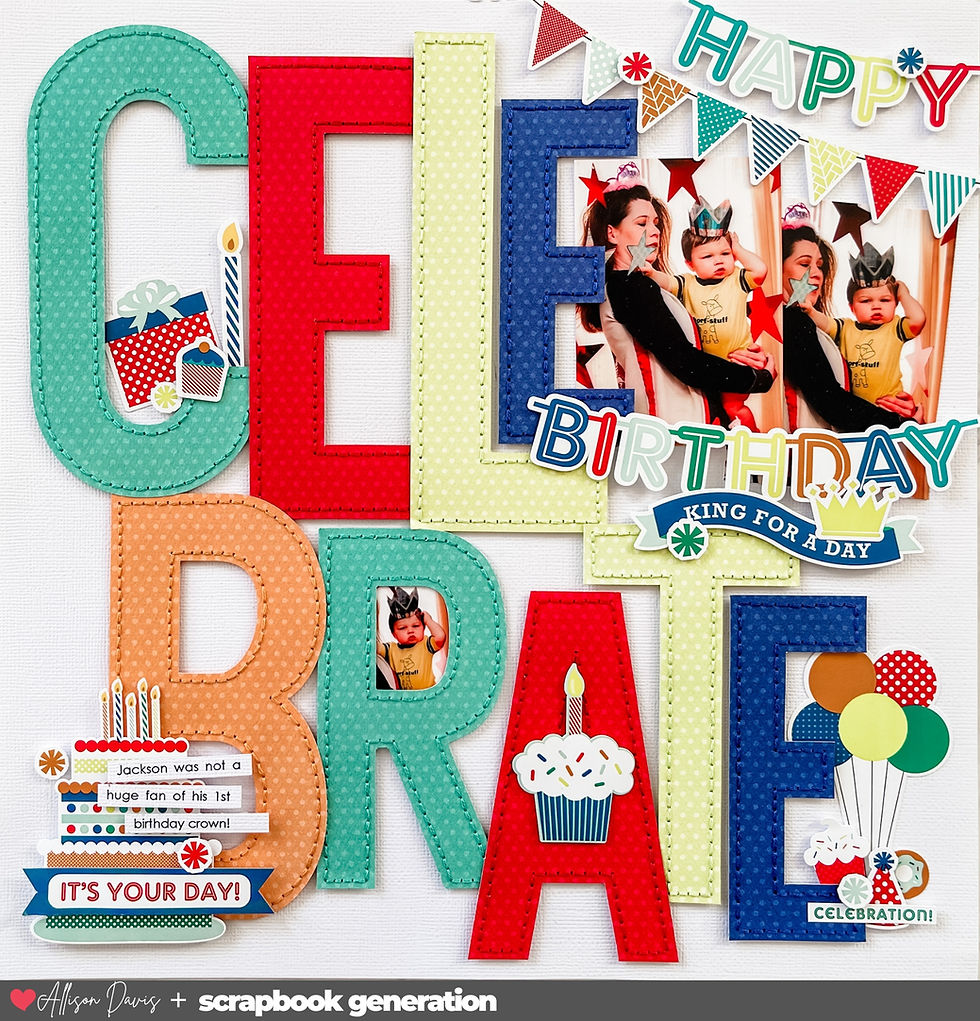
My day two layout was so fun to create!!
Here is the one-page sketch that each layout this week will be based on:

You can also grab the Sketch Support #37 Bonus Sketch Examples!

This month it is a 3-page PDF of 23 different sketch options. That makes 24 sketches for this month of Sketch Support. There are options that show how to change up the papers, use more photos, use less photos, there are four two-page options, and then an 8-1/2 x 11" option. The fun part is that you could use each option as a layout on its own, but you could also mix and match different options for endless possibilities!

Supplies used - Cardstock, patterned paper, stickers, and die cuts: American Crafts; Star punches: Fiskars and Recollections; Embroidery floss: DMC; Computer font: Century Gothic.
This layout is what happens when a patterned paper and sketch come together in perfect harmony!
Variation #1 - Flipping the sketch.
I ended up flipping the sketch so that the bottom photos are on the left instead of the right. With the direction Jackson is facing in the photos I felt like they looked much better on the left to keep him from facing off the layout. This usually ends up being the most common reason I will flip a sketch.

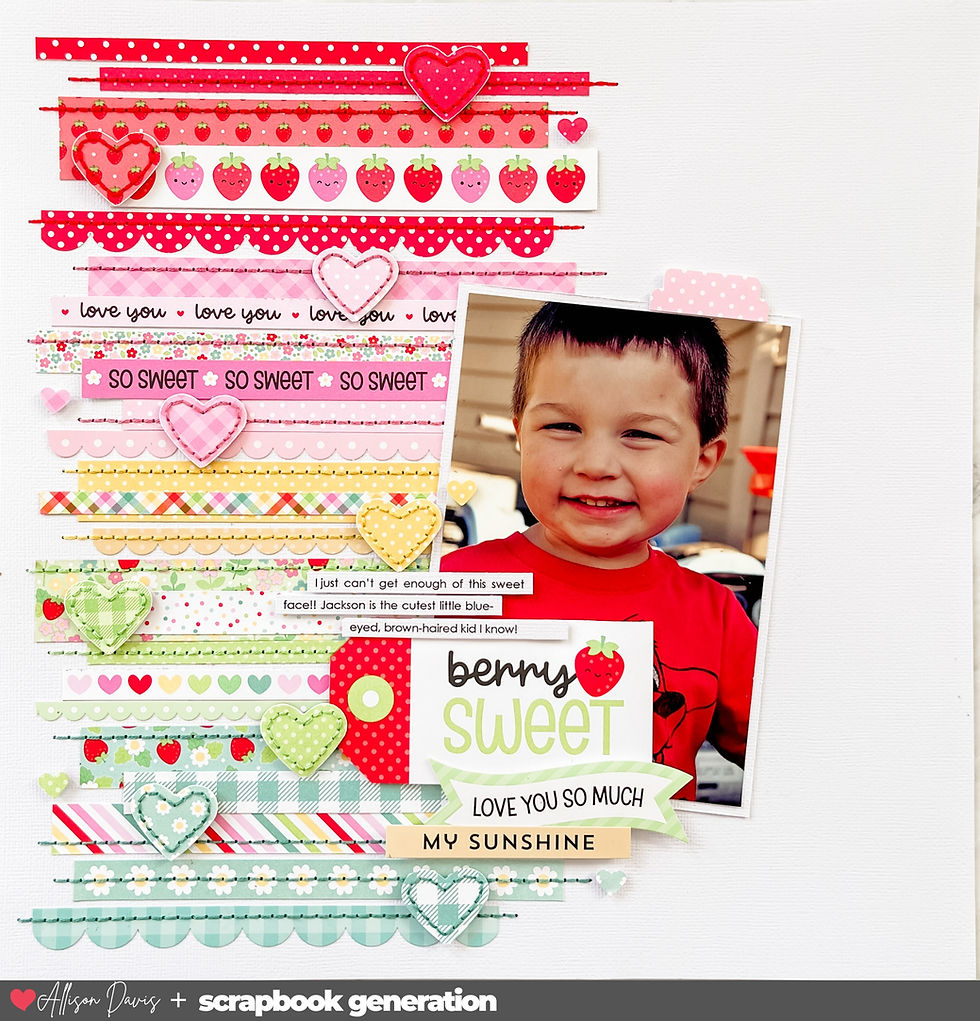
Variation #2 - Adapting the wavy design.
I instantly fell in love with this "Whatevs" collection from American Crafts, and especially this wavy paper. I just knew I had to do something fun with it! And then when I got to planning layout ideas with this sketch I remembered this paper and a major light bulb went off in my head.

I cut along the design of the strips and adhered some of them on the 12x12" cardstock base. They aren't quite the same as the wavy design on the sketch, but the rest of the layout details can work almost the same as the sketch.

I added stitching along the edges of each strip and then used star punches to punch out lots of stars in varying sizes. I then sanded the edges to define them and then adhered them along the strips.

That's all for today! Be sure to check back tomorrow for the third layout!
Also, if you enjoy all of the free sketches that I have created, be sure to join us in the Creating w/ Sketches Facebook Group! We have layout gallery for all of the free sketches that I have created.
Shop all sketches here: Allison Davis Sketches
Want to see more? Find me on...

The hours and minutes, indicated by two elongated baton-type link hands, are set by link the DUW4101 caliber, a hand-wound mechanical link movement developed by Nomos that provides a 42-hour energy reserve and is housed in a steel case 37.
Effectively nothing else link has changed on this watch other than the size. The movement is the same caliber 3230, the case remains stainless steel, and the dial has the same recognizable link layout. In fact, in this new large format, Rolex has kept the Explorer text up at 12 o'clock on the dial (the link 39 model moved it above the chronometer certification text).