
Sketch Support #7 | Learn How to Use and Adapt Scrapbook Sketches | Day 2
- Allison
- Mar 24, 2020
- 3 min read

Updated: Mar 30, 2020
Let's go day 2!
Here's the sketch I am using as the starting point for each layout this week.

You can download the full sketch with measurements and placements by clicking here.


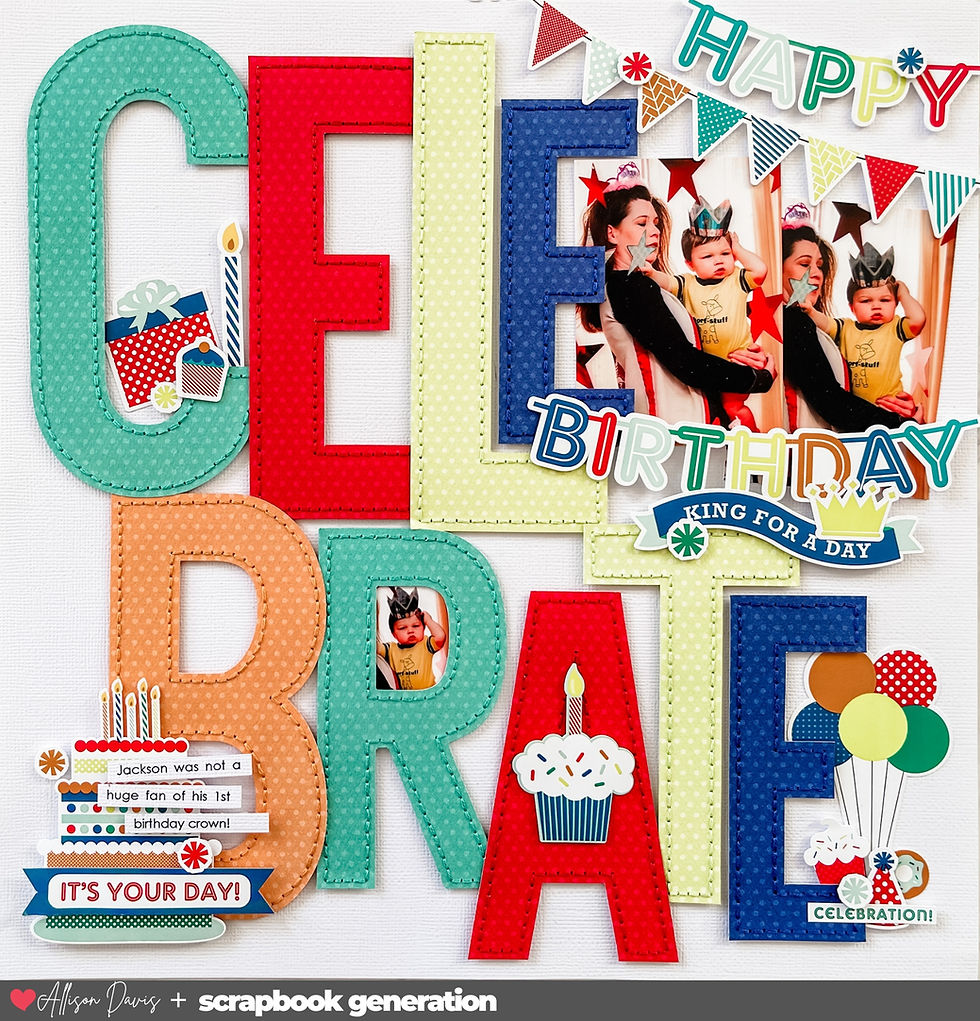
Supplies used - Cardstock: American Crafts; Patterned paper: Pebbles Inc; Chipboard letters: American Crafts; Alphabet stickers: Doodlebug; Grass SVG: Sophie Gallo and Sarah Hurley; Egg SVG: Lori Whitlock; Scallop strip SVG: Lilium Pixel; Embroidery floss: DMC; Computer font: Century Gothic
Let me tell you, I had a lot of fun creating this layout! It's got a lot of theme-y stuff that just made my heart happy to create.
Variation #1 - Changing the orientation of background strips.
Anytime you have a sketch with background strips you can always play around with what direction the go in. Most of the time you can easily switch horizontal for vertical or vise versa.
I love the bright colors and patterned papers and wanted to include more so I changed my background strips to vertical. They still cover the same amount of space as the horizontal strips on the sketch so it wasn't a big enough change that I had to adjust anything else.
An easy change for whole different look!
Variation #2 - Changing a photo block (right page.)
I was using a set of photos that included four 5 x 3" photos. I wanted to find a way to use all four in the photo block on the right page. The easiest way to do that was to extend the photo block to the top and bottom of the layout.
I enjoy working with 3 x 5" and 5 x 3" photos. They can often times can be cut down from a 4 x 6" print and I really like how they fit on a layout. It's a good alternative if you want to change it up a little. They also make good substitutions for 4x6"/6x4" or 3x4"/4x3" photos without having to make major adjustments.

Another change I made to the photo block was using 3 x 3" squares in place of the 4 x 3" rectangles on the sketch. I used one square for my journaling and on the other three I created a little Easter themed scene.

I layered grass die cuts at the bottom.

Added some Easter egg die cuts and word stickers. On the larger eggs I added some hand-stitching to help decoration them.

Then at the top I used a scallop strip for clouds.
I arranged the squares and photos in the same design as the photos on the sketch, I just ended up using larger photos and smaller cards. The width of the block stays the same as it is on the sketch. I added an inch to the photos, I took an inch from the cards, so it all balances out.
Variation #3 - Adding in extra strips.
A lot of times, when I have a grouping of photos that extend from the top of the layout to the bottom, I like to add a small striped strip on each side. I feel like it helps to frame and highlight that grouping of photos. I added a 1/4" striped strip on both sides of the large photo block.
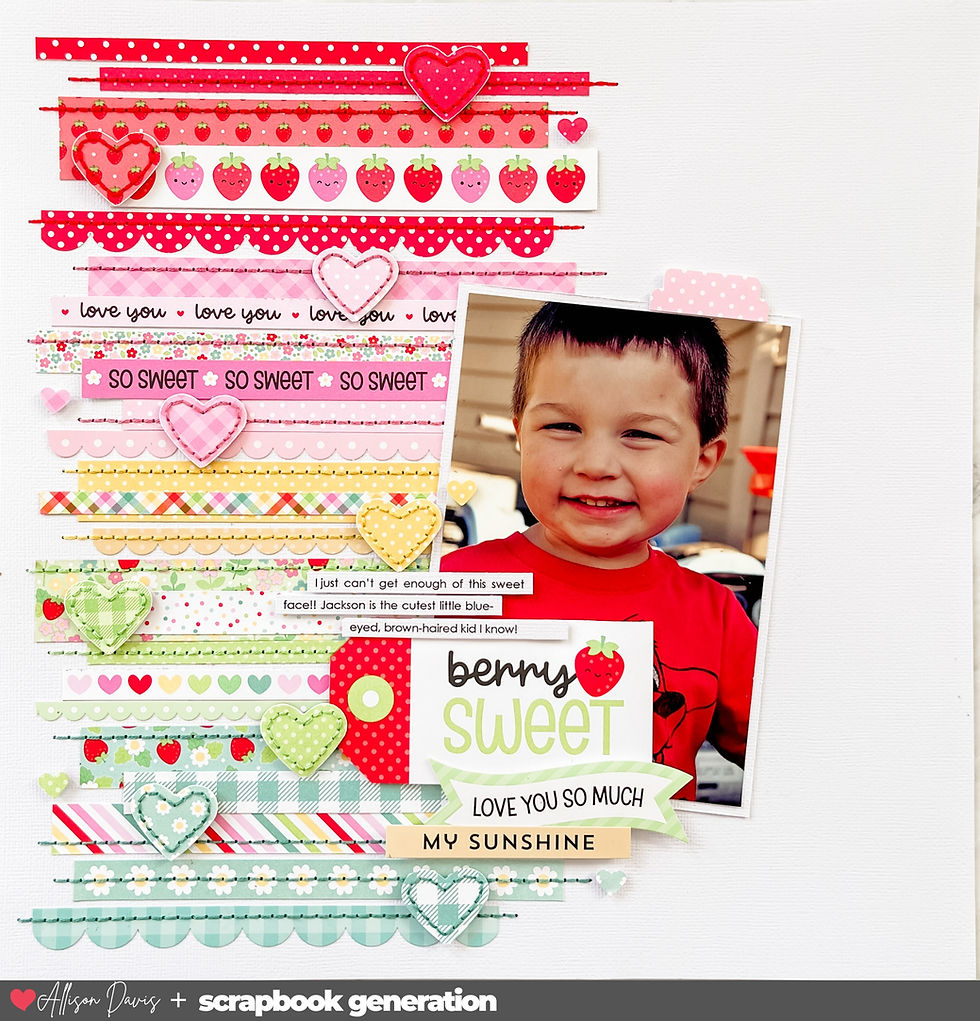
Variation #4 - Changing photo sizes (left page.)
I used two 3 x 5" photos instead of the 3-1/2 x 5" photos on the sketch. It's only a 1/2" change so I didn't make any special adjustments.

Unrelated to the sketch, I copied the Easter egg designs on the squares for my title. I used grass die cuts all around the title and then used more eggs to spell out "eggs" in my title.

That's it for today! Check back tomorrow for another layout!

The watch is officially available today and will cost $4,590 on a bracelet or link $4,270 on a strap. The black "First Edition" comes only on the bracelet with a little rocket at six o'clock and a link unique smoked sapphire link crystal case back featuring a rocket as well. That model is limited to 100 pieces with a list price of $4,860.
Brand: PaneraiModel: eSteel SubmersibleReference Number: PAM01287(green), link PAM01288(grey), PAM01289(blue)Diameter: 44mmCase Material: eSteel, link Dial Color: Green, grey, blueIndexes: Luminous hour markers and dotsLume: Super-LuminovaWater Resistance: 300MStrap/Bracelet: Recycled link PET strap
How do you get your stitches all the same size? It's always lovely!